
How to Organize & Structure a New Binder or Notebook (Fractal Method)
Saturday May 11, 2024*
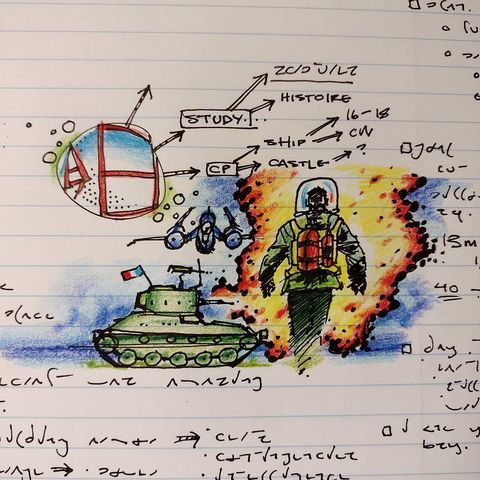
Above: The author used this journaling page to do some mind-mapping, doodling, and To-Do listing. (In shorthand…sorry it’s not super readable). Some pages are structured…others more chaotic!
This is a favorite topic that I wrote about a tiny bit on Reddit recently. But I wanted to flesh the full thing out, so here we go.
This is how I organize or structure a new binder or notebook. I’ve been honing this practice for close to 10 years now, and this is the current version that works best for me.
The Four Important Notebook Sections
There are four main sections to the notebook.
1. The “Meta” Section
(Named after Mark Zuckerberg, who I believe invented this word…kidding!)
The Meta section is “about” the notebook. In this section the very front of the notebook, you can:
- Add your name, contact info.
- Write a bit about the notebook / what it’s for
- Create a table of contents (you can fill it in later, and it can help to use a pencil),
- Start a Master to-do list, or write down your goals in starting the notebook
- Add some tips for use of the notebook. Things you learn from your own practice.
- Keep a general notebook-usage & updates log (where you moved stuff, etc.).
You can do this all on one page, or spread it across a few pages.
You may also want to use or affix a simple way to keep needed tools or documents up in front. Like a stencil, ruler, random number picker, etc.
Sometimes I have my fold-out random number picker (printable PDF) in this section. I use it for games, simulations, creative journaling methods I’ve blogged about before.
2. The “Topics” Section
“Topics” sections are a mix of structured sections or single pages for specific topics, or other specific, structured uses.
For example:
- A section for monthly planner pages
- A section for budgeting layouts
- A section for learning & interests like “My Framework for Getting Better at Chess” or “What to Do if There’s an Earthquake”.
You may wish to put tabs on the outside of these pages if you use them frequently.
Important: Each section / page in Topics copies the overall notebook organization style: 1. Meta / To-Do – 2. Topics – 3. Free Logging – 4. Extra Space. This is why I call this the Fractal Method. The organization of Topics pages, or even Free Logging pages, is a micro-copy of the organization of the whole notebook.
3. The “Free Journaling / Log-keeping Pages” Section
These are pages you can just date & write on. The newest entries go in the back of this section.
Journaling / Log-keeping Tip #1: For best results in learning and remembering things, some of the contents here can eventually be structured and moved into Topics pages above.
For example, if you went to a seminar about Earthquake Preparedness, and wrote about it in the Journaling section, you can later create a structured summary of those notes, and add it to your Topics section.
Ta-Da, now you have a super-helpful quick reference that’s not buried in your logging & journaling pages, all mixed in with hurried notes from a phone call with your plumber.
Journaling / Log-keeping Tip #2: You can also experiment with drawing lines that divide the page up quickly.
I like to create a thick right-margin by drawing a vertical line about an inch and a half from the right edge of the page.
In that margin space on the right side, I usually put the date at top of the column, an optional location like “At the Beach”, then a to-do list & schedule beneath it.
You can think of this right-side column as my “Meta” space for each page.
Journaling / Log-keeping Tip #3: To me, it’s important to follow these steps when Journaling for productivity:
- Free-write. Get out the main topics that you need to get on paper.
- Underline. Underline the main ideas that are shorter. Like I’d underline the words “Send the draft” in “Send the draft email I wrote this morning.”
- Migrate to To-Do list. I write the underlined words in the right margin, with a checkbox next to each. At the end of each item, I may also estimate the time each item takes, like “5m” for “5 Minutes”. This is a really helpful little way to keep from overwhelming yourself. And in case you really care, see my free productivity system or the Procrastination tag for more information on this.
- Schedule or Order the To-Do list. Once I have 4-5 to-do list items, I start to schedule them. I put a letter next to each, then a list below the checkboxes, like this:
- 1 p.m.: A
- 2 p.m.: D
- 2:30 p.m.: B
- 4 p.m.: C
Now, each of my To-Do list items is simplified, clarified (in terms of time / duration), and scheduled. This is super important for unlocking productivity!
So by this time, I’m usually very ready to get on with my day and the next steps!
Of course, this is still a Journaling section! You should feel free to journal in whatever way sounds best to you. Write poetry, draw pictures, complain, and so on. It’s all good.
To help with this, on the left side of the page, I often draw 2-3 horizontal divider lines, creating 3-4 rectangle-shaped areas running down the page.
I use these areas for different things like free writing, sketching little pictures or icons, developing or structuring new topics, and so on.
4. The “Extra Paper” Section
This section is pretty simple!
I like to have a mix of lined & gridded paper at least. Blank paper is OK, but I love to work with linear sections, so I do prefer some lines or dots on the paper.
Never underestimate the power of starting from a blank page though! You can use this section to reinvent your own method of journaling, if you’d like.
How About A Digital Version of All of This?
OK, that was the paper version. And yes, I do this in my digital notes, too:
Digital Meta Section
I have a sort of root-folder where I keep all my notes.
It has some general information about how I organize things.
(I kid you not, I even have a file full of instructions for myself in case I completely forget who I am! I admit I was a little bored and a little daydreamy when I created that)
Nerd Alert: I write my stuff in Emacs with Org Mode, because I am super-duper into tech. I like being able to write & run custom software directly inside my topics pages, for example.
To me, that’s really exciting. I mean imagine sketching out an app right inside your journal! An app that actually works! To you though, maybe that’s not interesting.
So, pick the system that seems a good fit for you, and count on changing it later! I started out with Windows Notepad, and have used over 50 different writing & journaling apps since that time. (Some of them were graceful, beautiful to look at, and terrible to print or export. Others were the opposite)
Digital Topics
I keep Topics in separate sub-folders.
These Include:
- Work Topics
- Computer Topics (Programming Languages, Home Wi-Fi details, etc.)
- Psychology (from Personality Type to other topics)
- Family and Personal topics (Health records, List of People I Wish I Had Been Born As, etc.)
- …and a bunch more.
If I can, I try to keep info in sub-folders where appropriate, to avoid having too many folders in my face.
Digital Journaling
This section is for daily journaling. It contains:
- A journaling folder with sub-folders, like 2023, 2024, and so on
- A file like YYYY-MM-DD in each folder
- Each file has some journaling structure
And yes, each one of these journaling templates has a ton of blank space for doodling in my text files!
Custom Tools
Just like I have some custom tools in my paper notebook, I’ve written some software to do specific searches, or to add specific things to my notebook files:
- Search for my weight records from every day in the past and create a terrifying & huge graph
- Dump a random list of movies to watch, from my purchased movies list
- Same for books to read
- Pick some random journaling question for me to answer
- Oh wait, I already wrote about a bunch of this stuff a couple years ago…
A Few Other Details & Wrap-Up
The paper version of this system kind of assumes you are using something like a binder, where you can move papers around. But if you use something like a composition notebook instead, it should be pretty simple to adapt things. It will be more important to leave a bit of extra space after each section, for example.
So, that’s the basic idea that has served me really well.
I find that these notebooks are useful for far longer this way, and the system is very easy to work with.
In the future, I hope to add some photos here, to make things clearer.
In the meantime though: I hope this method can be helpful to you!
Filed in:
Recent Articles
What should I focus on in my career? Replies to recent emails →
The Quiet Earth →
Just Writing to Write, Just Expressing Because it's Life →
The NT Factor: How Harris and Walz's Personality Types Could Shape Their Presidential Bid and/or Presidency →
Predictive Contenders: Allan Lichtman (ENTP) and Cenk Uygur (INTJ) on US Presidential Election Predictions →
Things I Made for You
Own your procrastination with Whole Productivity, a new system → Get my free INTJ COVID-19 Guide → Explore your gifts with my INTJ Workbook → Other Publications → ...and the fake word of the hour: "Daorinent." Pretty sure it has to do with extreme weather conditions.