From my Notebook >
USNROV-1 Remote Submersible
I was doodling little submarines and wanted to develop the idea a bit more, so I created a 3D model of it on the computer.
When I finished the 3D model, I exported it into an image editor to add the ocean environment and other lighting effects.
Doodles
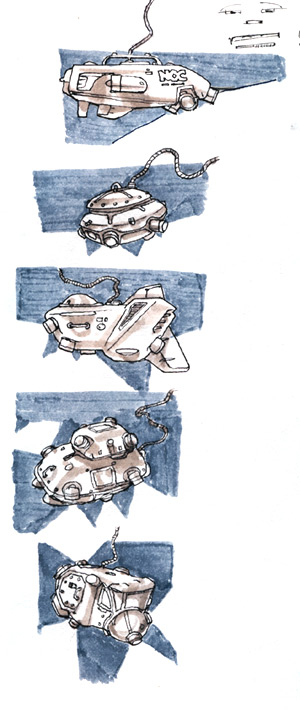
Here’s what my doodle sheet looked like. Lots of different ideas…these are all very small, about 1 inch (2.5cm) square each. To come up with an idea, I would just put pen to paper and draw an outline, first. Then I would try to think how that outline would represent certain parts of the submersible sticking out here or there.
It’s kind of like a “thinking” outline, really — I don’t draw it very fast. Slow and deliberate, without going backward with the pen stroke.
3D imagery
Here’s the image in my 3D modeling software (Blender) :

And here’s the “rendered” version, which is what I imported into the image editor I was using (GIMP — although I often use Photoshop too):
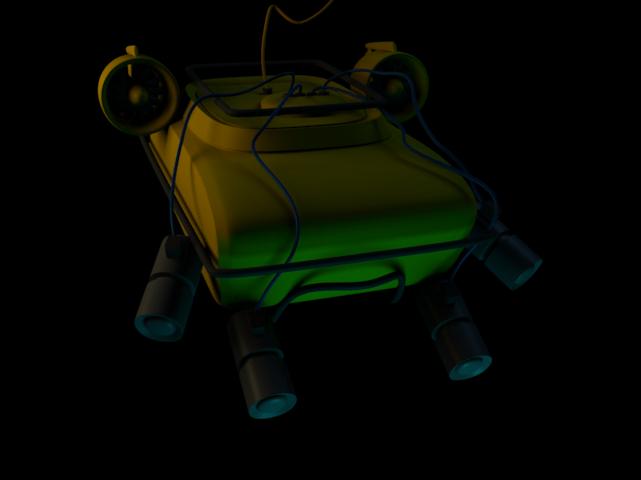
That’s not quite the right one, since I had added decals and other bits. But it’s close.
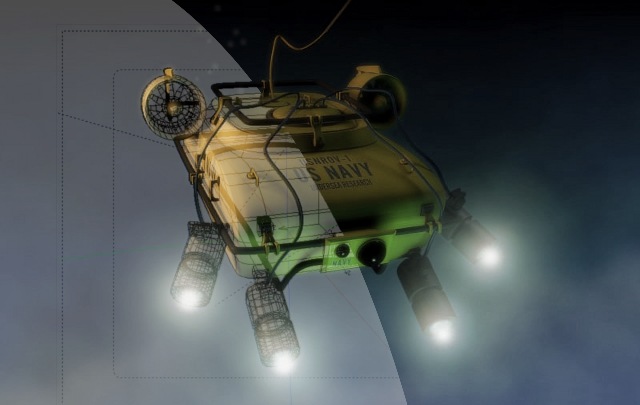
Here’s an early work in progress:
Note the message about eBay — I had just found out that someone was using my imagery from previous projects, without my permission, to sell free software on eBay. Not cool!
OK, so here’s a rough animation of the build-up process inside GIMP. Sorry for the low quality…

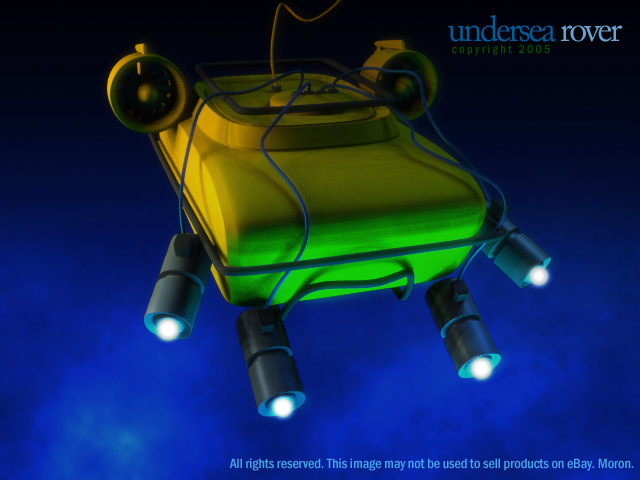
Finally, here’s where it’s ended up today. I toned down the colors as I felt it deserved a more subdued environment.
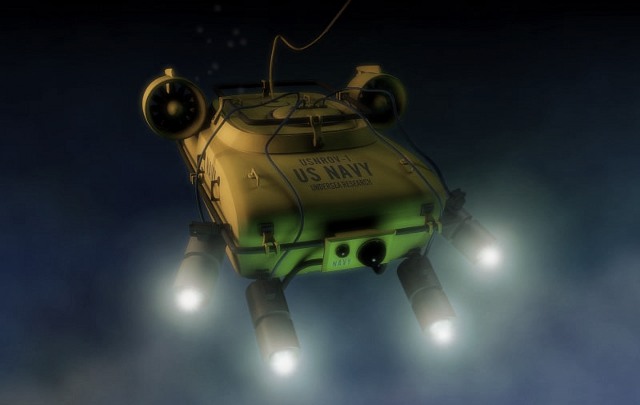
So, all the bubbles, marine fog, light halos, etc. were added in GIMP after I created the 3D model. This took much less time than trying to achieve the effects in 3D.